Recording in 4K isn’t about what you can see on today’s screens; it’s about creating the highest quality digital master file to preserve your family’s memories for the future.
- 4K footage provides significantly more detail and richer color, even when viewed on a standard 1080p display, due to a process called downsampling.
- For fast-moving subjects like children playing sports, smooth motion from 60fps footage is often more important than the raw resolution of 4K.
- Protecting your video archive is critical. A « 3-2-1 » backup strategy ensures your digital legacy is safe from device failure, loss, or accidents.
Recommendation: Use 4K for important, relatively static moments (like a school play performance) and switch to 1080p at 60fps for sports or fast action. Most importantly, establish a yearly routine to offload and back up your footage.
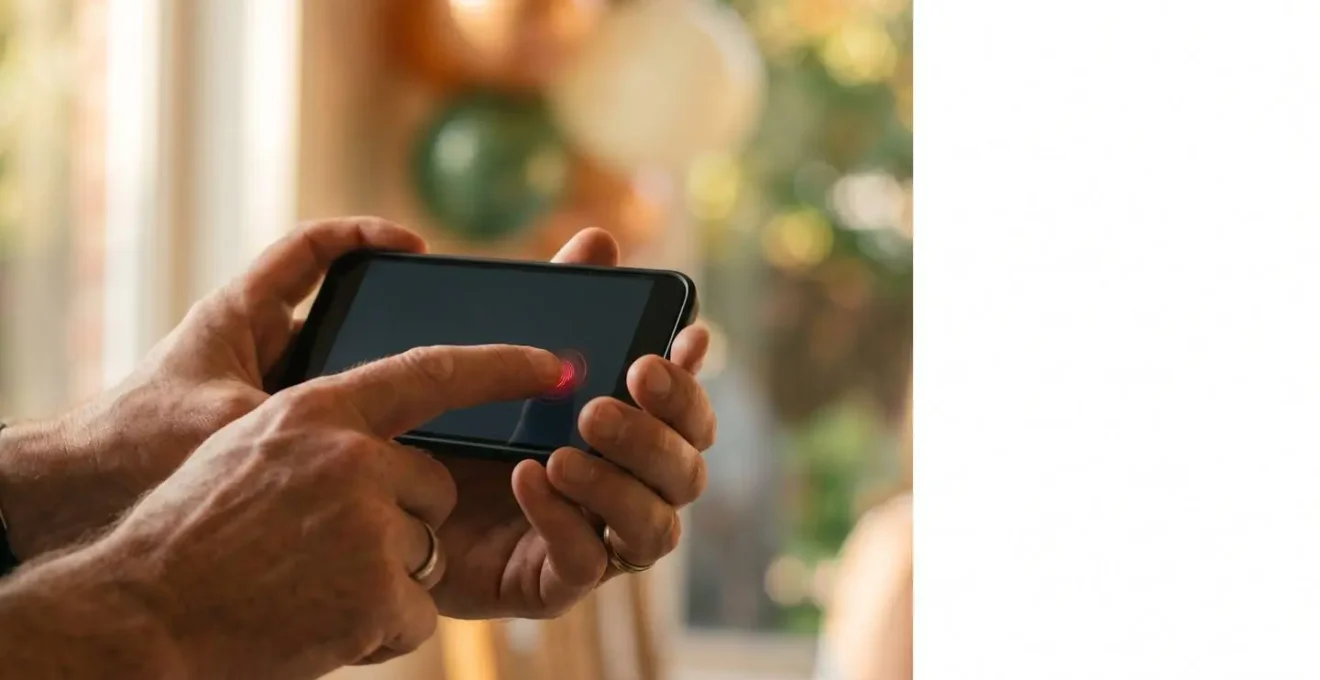
You’re there, sitting in the audience, your child about to step onto the stage for their school play. You pull out your phone, ready to capture this fleeting moment forever. But as you open the camera app, a familiar dilemma strikes: should you hit that « 4K » button? Common advice often creates confusion. You hear that 4K files are enormous and that you can’t even see the difference without a fancy TV. This leads many parents to default to 1080p, fearing the hassle of managing massive files.
But what if we reframe the question? Instead of asking which format is better for today, let’s ask: which format creates a better digital legacy for tomorrow? As a digital archivist, my focus is on preservation and long-term value. The choice between 4K and 1080p isn’t just about pixels; it’s a decision about the quality of the « digital negative » you’re creating. This is about ensuring the videos of your children’s first steps, their school performances, and family holidays retain their clarity and emotional impact for decades to come, viewable on technologies we can’t yet imagine.
This guide moves beyond the simple « more pixels is better » argument. We will explore this decision from an archival perspective. We’ll examine why 4K footage holds hidden advantages, when to prioritize smooth motion over resolution, how to manage the workflow without a powerful computer, and most importantly, how to build a robust system to protect these irreplaceable memories. It’s time to stop thinking like a casual user and start thinking like a family archivist.
To navigate these critical choices, this article breaks down the essential factors you need to consider. The following sections will provide clear, practical guidance on everything from resolution and frame rates to color depth and long-term storage, empowering you to make the best decisions for preserving your family’s story.
Summary: A Guide to Choosing Between 4K and 1080p for Lasting Memories
- Why 4K videos look sharper even when watched on a 1080p screen?
- How to move 4K files to an external drive without a computer?
- 4K at 30fps or 1080p at 60fps: which looks better for fast-moving kids?
- The processing bottleneck that makes editing 4K footage on a phone painful
- What order to compress files before sending them to grandparents on WhatsApp?
- Why 10-bit color recording prevents « banding » in your sunset videos?
- How to offload data annually to keep the flash storage controller fast?
- High Dynamic Range: How to Shoot Vlogs That Look Professional in Mixed Lighting?
Why 4K videos look sharper even when watched on a 1080p screen?
One of the most persistent myths is that you need a 4K screen to benefit from 4K recording. From an archivist’s viewpoint, this misses the fundamental advantage of a high-quality master file. When you record in 4K but watch on a 1080p (Full HD) screen, your device performs a process called downsampling or oversampling. It intelligently combines the information from the four pixels in the 4K image to create a single, superior pixel in the 1080p image. This isn’t a simple discard of data; it’s a sophisticated consolidation.
The result is a 1080p image that is visibly sharper, cleaner, and more color-accurate than one recorded natively in 1080p. By starting with 4x the data for every pixel, the downsampled image retains finer details that would have been completely lost otherwise. A professional video production study directly compared native 1080p footage to downscaled 4K footage. The results were stark: the downscaled 4K image showed significantly more clarity, revealing subtle details like textures and fine lines that were entirely absent in the native 1080p version.
Think of it as creating a high-resolution « digital negative. » Even if you only print small photos from it today, the wealth of information in the negative ensures those small prints are as crisp as possible. Recording in 4K gives your family memories this built-in advantage, ensuring they look their best on current displays while being perfectly preserved for the future-proof screens of tomorrow.
How to move 4K files to an external drive without a computer?
The single biggest deterrent for parents considering 4K is the file size and the perceived hassle of managing it. A few minutes of 4K video can consume gigabytes of phone storage. The good news is that modern technology offers elegant solutions that don’t require you to be tethered to a computer. For parents capturing memories on the go, the most effective method is recording directly to an external portable Solid-State Drive (SSD).
This workflow is surprisingly simple, especially with modern iPhones (iPhone 15 Pro and later) that feature a USB-C port with high-speed data transfer capabilities. You can connect a compatible portable SSD directly to your phone. Before first use, the drive needs a one-time formatting to a compatible file system like exFAT or APFS, which can be done on any computer. Once that’s set up, you simply enable the high-quality recording format (like Apple ProRes) in your phone’s camera settings. The camera app will automatically detect the external drive and save the massive 4K files directly to it, bypassing your phone’s internal storage entirely.
This method transforms your workflow. It eliminates the fear of running out of space mid-recording and removes the tedious step of transferring huge files from your phone to a computer later. You end the day with your precious 4K footage already secured on a durable, portable drive, ready for archiving. It’s a professional-grade solution made accessible for preserving family memories at the highest quality without the traditional computer-based bottleneck.
4K at 30fps or 1080p at 60fps: which looks better for fast-moving kids?
While 4K offers superior detail, the best choice for capturing your child’s soccer game or a chaotic birthday party involves a trade-off between resolution (detail) and frame rate (smoothness). Frame rate, measured in frames per second (fps), determines how motion is rendered. For fast, unpredictable action, a higher frame rate is often more important than a higher resolution.
Recording at 60fps captures twice as many individual images per second as the standard 30fps. According to frame rate analysis, 60fps reduces motion blur and makes quick movements look much smoother. When your child is running across a field, each frame at 30fps captures a wider window of movement, resulting in a slight but noticeable blur. At 60fps, the motion is crisper and clearer, making it easier to follow the action. Furthermore, 60fps footage gives you the flexibility to create clean, smooth slow-motion replays by slowing it down by half, a fantastic tool for highlighting a special moment.
This table breaks down the core trade-offs, helping you make an informed decision based on the situation you are recording. For a relatively static event like a school play monologue, 4K at 30fps is the clear winner for its incredible detail. But for a sports day, 1080p at 60fps will produce a more visually pleasing and clear result.
| Aspect | 30fps | 60fps |
|---|---|---|
| Motion Blur | Fast motion appears slightly blurry – wider window of movement captured per frame | Extra frames reduce motion blur significantly – cleaner for panning and quick movements |
| File Size (1 min 1080p) | ~130 MB | ~200 MB (50-60% larger) |
| Best Use Cases | Interviews, talking-head videos, static content, TV broadcasts, vlogs | Sports, gaming, drone footage, action cameras, fitness videos, fast or unpredictable movement |
| Slow-Motion Capability | Limited – requires interpolation | Can create smooth 2x slow-motion by slowing to 30fps with no artifacts |
| Battery Impact | Standard drain – better for long events | Uses more processing power and drains batteries faster |
The processing bottleneck that makes editing 4K footage on a phone painful
So you’ve captured that beautiful 4K footage. Now you want to trim the beginning and end or combine a few clips on your phone before sharing. This is where many people experience the « pain » of 4K: stuttering playback, lagging edits, and long export times. This isn’t because your phone is « bad »; it’s because of a fundamental processing bottleneck related to video compression.
Modern 4K video is typically compressed using the H.265 (or HEVC) codec, which is incredibly efficient at making files smaller. However, this efficiency comes at a cost: it requires immense computational power to decompress (decode) in real-time for editing. Your phone’s processor has to work extremely hard just to play the file back smoothly. Asking it to also handle edits, transitions, and re-encoding on the fly can overwhelm it. Codec performance benchmarks show that even powerful computer CPUs can be pushed to 90-100% utilization while trying to process H.265 video.
For a parent, this technical reality translates to a frustrating user experience. The key archival takeaway is to distinguish between the master file and the editing workflow. The 4K H.265 file is your pristine digital negative; it’s perfect for long-term storage. For editing, especially on a phone or older computer, it’s often better to create lower-resolution « proxy » files. These are temporary, lightweight copies that allow for smooth editing. Once you’re done, the editing software applies your changes back to the original high-quality 4K file for the final export. While this is more of an advanced technique, understanding this bottleneck helps set realistic expectations for what can be comfortably edited directly on a phone.
What order to compress files before sending them to grandparents on WhatsApp?
Sharing your precious moments with family is a primary goal, but sending a multi-gigabyte 4K file via WhatsApp is impractical and often impossible due to the platform’s heavy compression and file size limits. This is where the archivist’s mindset of protecting the « digital negative » is most critical. The process is not about compressing your original file, but about creating a separate, disposable « delivery copy. » The order of operations is crucial.
First and foremost, your original 4K file must remain untouched. This is your archival master copy. It should be safely stored on your hard drives and/or cloud backup. Never work directly on this file for a simple share.
The correct workflow is as follows:
- Edit First: If you need to trim the video or make small adjustments, do this first using a copy of your 4K file. Export the final, edited version as a new 4K master file and save it to your archive.
- Create a « Sharing Version »: Now, open this new 4K master file in a video editing app (even a simple one on your phone like iMovie or CapCut). Export the video again, but this time, intentionally lower the settings. A resolution of 1080p or even 720p is perfect for viewing on a phone screen. This will dramatically reduce the file size while maintaining excellent quality for a small display.
- Compress and Send: The resulting 1080p file will be a fraction of the original’s size and can be sent through WhatsApp without issue. The platform will still apply its own compression, but starting with a cleaner, smaller file yields a much better result.
This workflow ensures that your high-quality digital legacy remains pristine, while a fit-for-purpose, lower-quality version is used for casual sharing. You get the best of both worlds: perfect preservation and easy sharing.
Why 10-bit color recording prevents « banding » in your sunset videos?
Preserving a memory is about capturing a feeling, not just an image. A breathtaking sunset, with its subtle shifts from orange to purple, is a perfect example. However, you may have noticed that videos of such scenes sometimes show distracting, blocky layers of color instead of a smooth gradient. This ugly artifact is called color banding, and it’s a limitation of standard 8-bit color depth.
Most standard video is recorded in 8-bit color, which can display approximately 16.7 million colors. While that sounds like a lot, it can be insufficient for scenes with large areas of subtle tonal transition. In a sunset sky, the camera is forced to « round off » similar shades to the nearest available color in its limited palette, creating those visible steps. From an archival perspective, this is a technical flaw that degrades the emotional fidelity of the memory.
This is where 10-bit color, a feature now available on many high-end smartphones, becomes a game-changer for future-proofing. Instead of 16.7 million colors, 10-bit video can represent over a billion. According to video codec specifications, the HEVC Main 10 profile produces 1.07 billion colors. This exponentially larger palette gives the camera more than enough shades to render even the most delicate gradients perfectly smoothly. There are no more steps, no more bands—just the pure, seamless transition of light and color as you remember it. By capturing in 10-bit, you are preserving not just the scene, but the true visual quality and emotion of the moment.
How to offload data annually to keep the flash storage controller fast?
Relying on your phone as your primary video archive is a recipe for disaster. Phone storage is not designed for long-term preservation; it’s volatile, susceptible to loss, theft, or failure. Furthermore, as flash storage fills up, its performance can degrade, making the device feel slower. A true digital archivist knows that the most crucial step is a regular, disciplined offloading and backup routine.
The gold standard for data protection, used by professionals and adaptable for families, is the 3-2-1 backup strategy. This simple rule provides robust protection against almost any data loss scenario. An annual « archive day »—perhaps on New Year’s Day or a family anniversary—is the perfect time to implement this. Offloading data not only frees up your phone and keeps its storage controller running efficiently, but it also secures your digital legacy. For moving large 4K files, an SSD is invaluable; based on professional storage device testing, modern portable SSDs can transfer data at over 2000 MB/s, turning a task that once took hours into one that takes minutes.
Adopting this structured approach transforms your collection of files from a liability sitting on a single, vulnerable device into a resilient and secure family archive.
Your Action Plan: Implementing the 3-2-1 Backup Strategy for Family Videos
- Create 3 total copies: Make three complete copies of your precious video memories. Never, ever rely on a single copy stored on just your phone or one drive.
- Use 2 different media types: Store your copies on at least two different formats. For example, keep one copy on a fast portable SSD for quick access and a second on a traditional external Hard Disk Drive (HDD) for stable, long-term archival.
- Keep 1 copy off-site: Ensure one of your backup copies is physically located elsewhere. This can be a cloud storage service (like iCloud, Google Drive, or a specialized « cold storage » provider) or a hard drive kept at a trusted family member’s house to protect against local disasters like fire or theft.
- Schedule the ritual: Set an annual, recurring calendar reminder. This is the non-negotiable step to ensure you consistently migrate new videos from your phone to your primary archive drives.
- Plan for media lifecycle: No drive lasts forever. Hard drives have an average lifespan of 5-7 years. Set a separate 5-year reminder to migrate your entire archive from the old drives to new ones to prevent data loss from media failure.
Key Takeaways
- 4K is not just for 4K screens; it creates a superior, more detailed 1080p image on standard displays through a process called downsampling.
- For fast action (like sports), prioritize a high frame rate (60fps), even at 1080p, over 4K resolution to minimize motion blur and capture smooth movement.
- The « 3-2-1 backup » strategy (3 copies, 2 different media types, 1 off-site) is the gold standard for protecting your family’s irreplaceable digital legacy from any single point of failure.
High Dynamic Range: How to Shoot Vlogs That Look Professional in Mixed Lighting?
The school play is a classic example of challenging « mixed lighting »: a brightly lit stage against a dark auditorium. Your phone’s camera struggles to expose for both simultaneously, often resulting in a blown-out, overly bright stage or a crushingly dark, noisy audience. This is where High Dynamic Range (HDR) video becomes an essential tool for creating professional-looking, balanced footage.
HDR works by capturing information from the brightest highlights and the darkest shadows in a scene at the same time and intelligently blending them. The result is a single, balanced image that looks much closer to what your own eyes can see. You can see the details in your child’s costume on stage without the surrounding area turning into a grainy, black void. While the term « vlog » might sound professional, the principles apply directly to family videos. YouTube’s official guidance for creators highlights that good lighting is essential for great video, and HDR technology is what allows the camera to take full advantage of it.
However, HDR is not a magic bullet. As YouTube’s best practices state, enabling 4K or HDR cannot fix footage shot in fundamentally poor lighting. Its power is in managing scenes with a high *contrast* of light. To get the best results, you should still try to position yourself where the main subject is well-lit. The power of combining 4K resolution with HDR is that it creates an incredibly rich and detailed master file that captures the scene with stunning realism. This quality is noticeable, with data according to YouTube’s official recommendations showing that 4K videos consistently get more watch time on TVs, proving that viewers (even family!) appreciate higher quality.
By shifting your perspective from a casual shooter to a dedicated family archivist, you can begin making deliberate choices that will pay dividends for years to come. Start today by reviewing your phone’s camera settings and creating a calendar reminder for your first annual archive day. Your future self—and future generations—will thank you.