In summary:
- Correct the orange glow from streetlights by understanding and adjusting your White Balance.
- Use walls, tables, and even your own body as a « human tripod » to eliminate camera shake.
- Soften your phone’s flash with simple tricks to avoid the « deer in headlights » look.
- Use Burst Mode to capture sharp action shots and let AI pick the best frame.
- Leverage your phone’s built-in AI tools to fix minor blur and remove grain after the shot is taken.
You’re out in Manchester with your friends, the vibe is perfect, the streetlights are hitting just right, and you pull out your phone to grab a memory. You tap the screen, and the result is… a blurry, grainy mess with everyone looking either like a ghost or an orange Oompa Loompa. Sound familiar? I see it all the time. Most online advice will tell you to « use Night Mode » or « find a light source, » but that’s like telling a chef to « use a pan. » It’s not the tool, but how you use it that makes the difference.
As a photographer who thrives in the dark, I’m going to let you in on a secret. The city isn’t your enemy; it’s your studio. Those harsh streetlights, glowing pub signs, and even the wall you’re leaning against are all part of your toolkit. Forget the idea that you need a bulky camera or tripod. The key isn’t more gear; it’s learning to see and manipulate the light that’s already there.
This guide isn’t about generic tips. It’s about changing the way you think. We’ll break down why your photos look orange, how to turn your environment into a professional stabilization rig, and when to use—and how to hack—your phone’s flash. We will explore how to freeze motion and master the powerful AI already sitting in your pocket. By the end, you’ll be equipped not just with settings, but with a photographer’s eye for capturing the energy of the night, sharp and clear, with the phone you already own.
In this guide, we’ll walk through the essential techniques that separate amateur snapshots from professional-quality night photography. The following sections provide a complete roadmap to mastering the dark with your phone.
Summary: A Guide to Flawless Night Shots on Your Phone
- Why standing under a streetlamp makes your skin look orange in photos?
- How to use your environment to stabilize your phone for long exposures?
- Flash or Night Mode: which one avoids the « deer in headlights » look?
- The movement mistake that ruins 90% of low-light action shots
- When is the « blue hour » in the UK and why is it better than total darkness?
- How does AI remove grain from low-light photos without blurring details?
- How to adjust ISO manually to reduce grain in indoor shots?
- AI Imaging Algorithms: How to Fix Blurry Night Shots Without Professional Editing Skills?
Why standing under a streetlamp makes your skin look orange in photos?
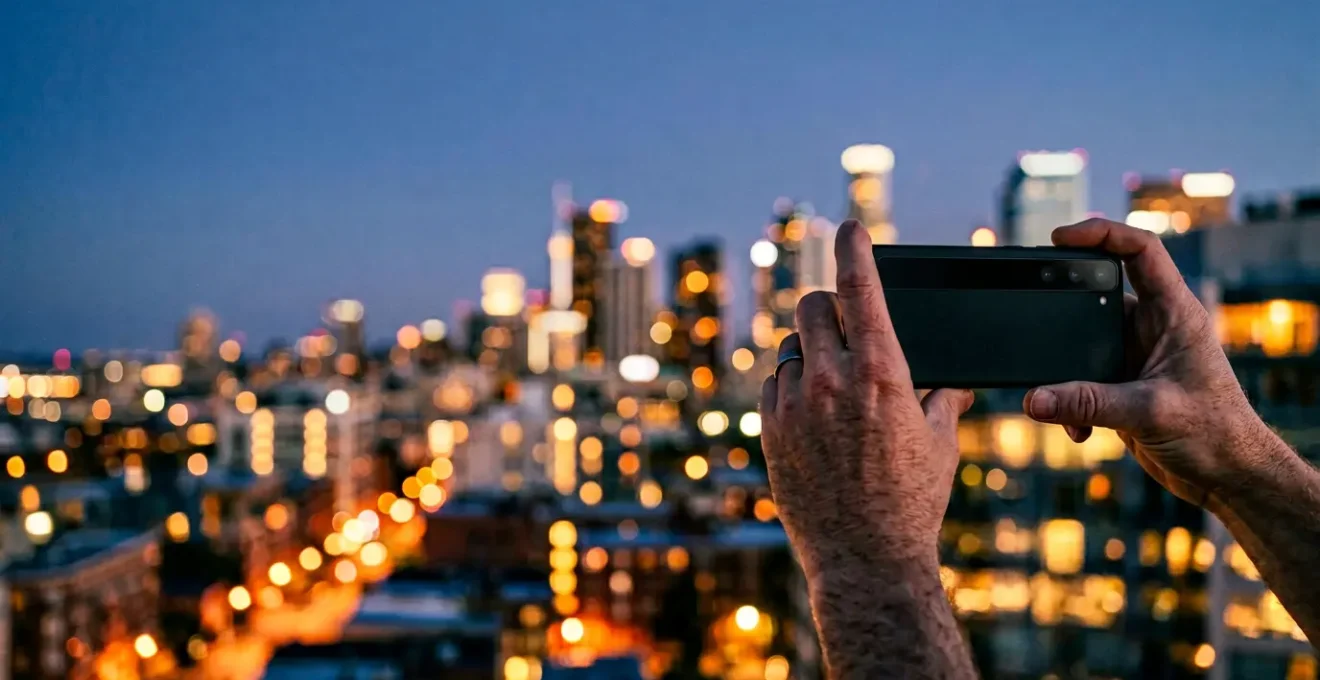
That notorious orange glow isn’t your phone’s fault; it’s physics. Most city streetlights, especially older ones, are sodium-vapor lamps. They are efficient, but they emit a very narrow, intense band of orange-yellow light. Your eyes are brilliant at auto-correcting this, tricking your brain into seeing a white-ish light. Your phone’s camera, however, just sees the raw, overwhelming orange. This is a concept called color temperature, measured in Kelvin (K).
While daylight is a cool 5600K, typical sodium-vapor lamps are extremely warm. In fact, according to color temperature data, they often sit around a very orange 2000K. When this light hits skin, it reflects that orange color directly into your camera’s sensor, overpowering any natural skin tones. The camera’s automatic white balance tries to compensate but is often overwhelmed by the intensity, resulting in that sickly, saturated look.
So, what’s the fix? First, avoid standing directly under the streetlight. Instead, use it as a backlight or have your subject stand a few feet away where the light is more diffused. Second, dive into your phone’s « Pro » or « Manual » mode. Look for the White Balance (WB) setting. Instead of ‘Auto’, try tapping through the presets like ‘Tungsten’ or ‘Fluorescent’ to see which one neutralizes the orange best. For a quick fix, find something truly white or grey in the scene (like a napkin or a wall) and use your phone’s custom WB tool to tap on it. This teaches the camera what « neutral » looks like in that light, instantly correcting the color for all your subsequent shots.
How to use your environment to stabilize your phone for long exposures?
The single biggest cause of blurry night photos is camera shake. When the light is low, your phone’s shutter needs to stay open longer to gather enough light. During this split second, any tiny hand movement creates a blur. The obvious solution is a tripod, but who brings a tripod on a night out? The real skill is turning your environment—and yourself—into a makeshift tripod.
Look around you. That pub table, brick wall, or parked car is now your best friend. Instead of holding the phone out in front of you, find a stable surface. Prop your phone against your pint glass, a stack of coasters, or your wallet. This provides a solid base, completely eliminating hand shake. Even a simple lean against a wall or a lamp post can dramatically increase your stability. The goal is to transfer the job of « staying still » from your muscles to a static object.
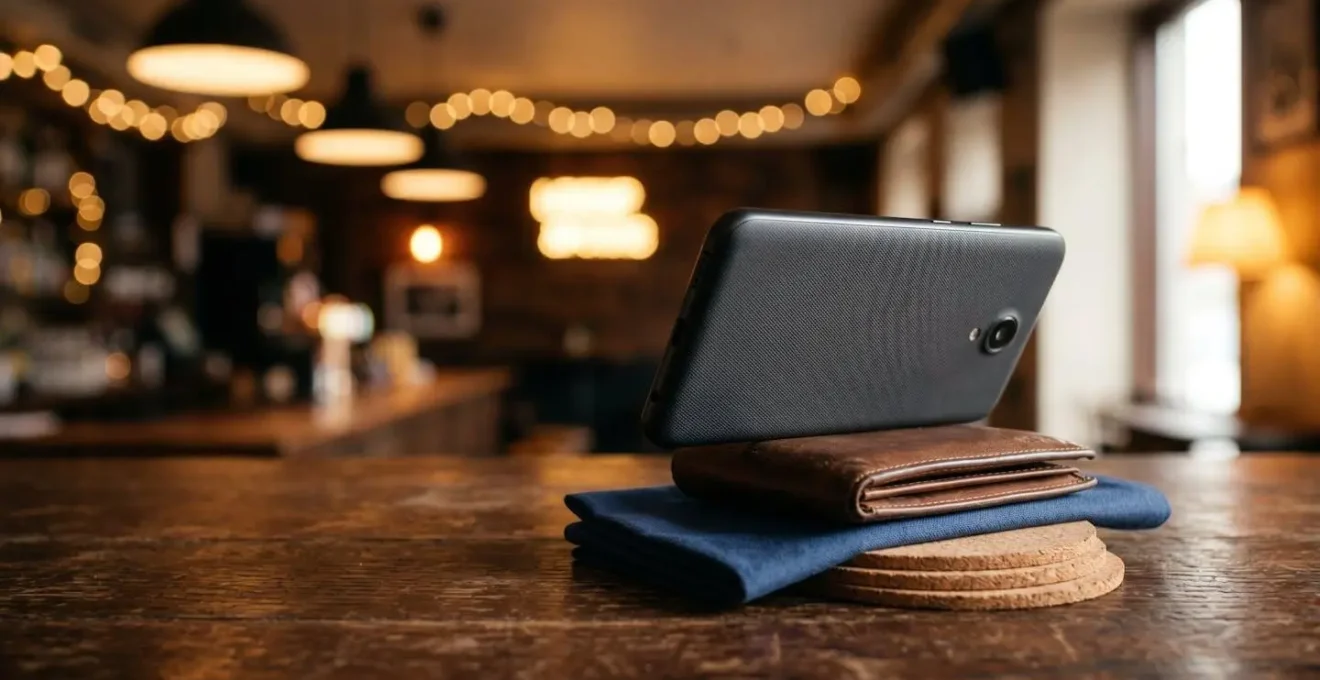
As the image shows, everyday items are your secret weapon. But what if there’s no surface available? Then you become the tripod. By adopting a stable stance, you can significantly reduce movement. Here’s the « human tripod » technique photographers use:
- Brace your elbows: Press both elbows firmly against your torso to create a stable triangle between your arms and body.
- Controlled breathing: Exhale slowly just before you press the shutter, then briefly hold your breath during the shot to minimize body movement.
- Volume button trigger: Use the physical volume button instead of tapping the screen. The act of tapping the screen introduces a surprising amount of shake.
- Timer delay: Set a 2 or 3-second self-timer. This allows any vibrations from pressing the button to settle before the picture is actually taken.
- Additional support: If possible, lean against a wall, resting both shoulders and one hip against it to create multiple points of stable contact.
Flash or Night Mode: which one avoids the « deer in headlights » look?
This is the classic dilemma. Night Mode gives you a soft, often blurry, image, while the built-in flash creates that harsh, washed-out « deer in headlights » effect with black backgrounds. The truth is, neither is perfect, but the flash can be tamed. The problem with your phone’s LED flash isn’t the light itself, but its size and direction. It’s a tiny, hard-light source firing directly at your subject, creating unflattering shadows and blown-out highlights.
The secret that pros know is diffusion. We use large softboxes to make the light source bigger and softer. You can replicate this effect with almost anything. You just need to place a semi-translucent object over the tiny LED to spread the light out. This transforms the harsh pinpoint of light into a broader, gentler source, wrapping it around your subject’s face more naturally and reducing harsh shadows. It’s a simple hack that makes a world of difference.
Let’s get practical. You don’t need to carry special equipment. The tools for better flash photography are likely already in your pocket or on your table. Here are a few DIY diffusion techniques you can use on your next night out:
- Partial finger diffusion: Cover about two-thirds of the flash LED with your index finger. This cuts the intensity and spreads the light more evenly across your friend’s face.
- Napkin diffuser: This is a classic. Place a single layer of a thin white napkin or tissue over the flash. It acts as a perfect miniature softbox.
- Translucent tape method: If you have it, a small piece of semi-transparent matte tape (like Scotch Magic Tape) over the flash will soften and diffuse the output beautifully.
- White card bounce: Hold a small white object, like the back of a business card or a folded piece of paper, at a 45-degree angle next to the flash. This « bounces » the light indirectly onto your subject rather than firing it straight on.
The movement mistake that ruins 90% of low-light action shots
You’ve stabilized your phone, but your photos of friends laughing or dancing are still a blurry mess. Here, we encounter the crucial distinction that separates beginners from those in the know: the difference between camera shake and subject motion blur. Camera shake is when your hand moves, making the *entire* image blurry. Subject motion is when your friend moves while the shutter is open, making *them* blurry against a sharp background. Stabilizing your phone solves the first problem, but not the second.
Trying to capture a single, perfectly timed shot of a moving person at night is a game of luck you will almost always lose. The shutter is open for too long, and any movement they make gets recorded as a blur. This is the mistake: trying to take just one photo. The solution isn’t to be faster than your subject; it’s to out-smart them with a tool you already have: Burst Mode.
By firing off 20-30 photos in a single second, you dramatically increase the odds that at least one frame captures the peak of the action in a moment of relative stillness. Modern smartphones are incredibly good at this, and their AI often even suggests the sharpest shot from the sequence for you. You’re no longer gambling on one perfect moment; you’re creating a window of opportunity.
Your Action Plan: The Burst Mode Strategy for Sharp Action
- Activate burst mode: Find this setting in your camera app. On most phones, you simply press and hold the shutter button.
- Anticipate the moment: Frame your shot and pre-focus on your subject *before* the action happens. Don’t wait for your friend to start laughing; be ready for it.
- Capture the sequence: Begin the burst capture slightly before the peak moment and continue firing through it. You want to capture the before, during, and after.
- Review and select: Go through the burst sequence. Your phone’s gallery (like Google Photos or Apple Photos) will often automatically highlight the sharpest and best-composed frame. Trust the AI.
- Keep the best, delete the rest: Save only the one or two sharpest images from the burst. This keeps your storage free and your camera roll clean.
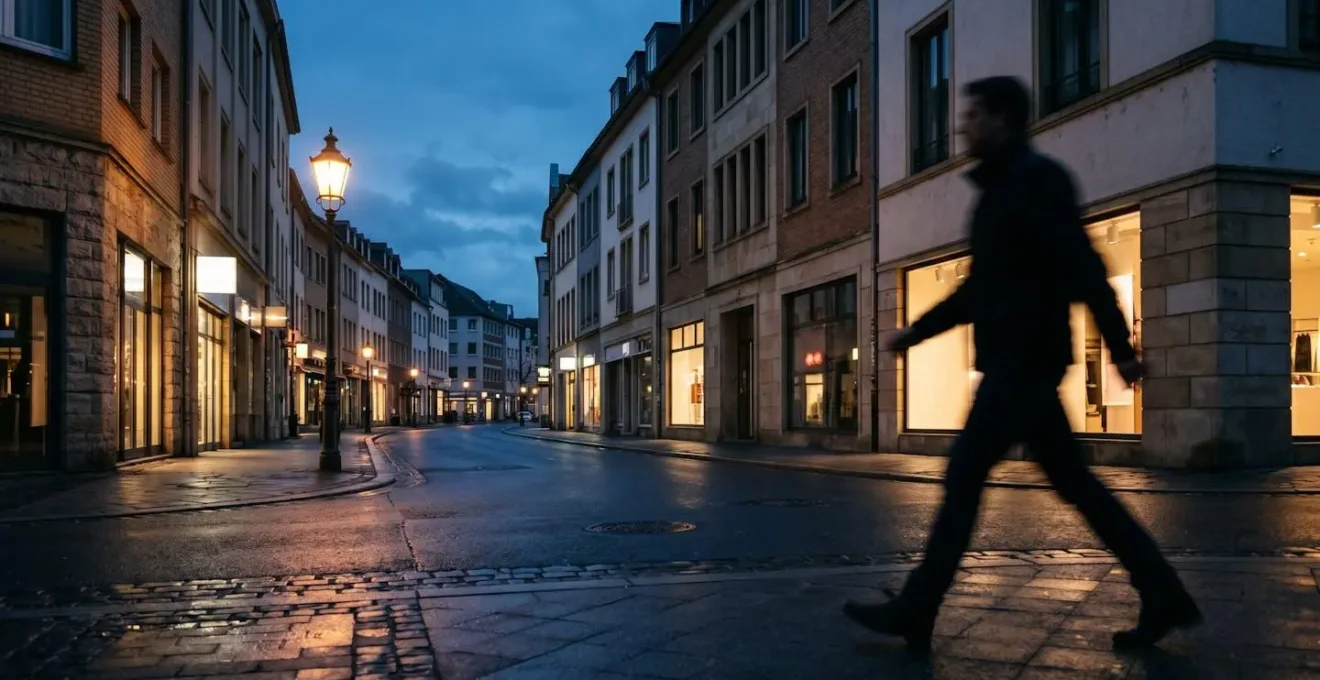
When is the « blue hour » in the UK and why is it better than total darkness?
As a nightlife photographer, some of my best « night » shots are taken before it’s truly night. There’s a magical window of time just after the sun sets but before the sky goes completely black, known as the « blue hour. » During this period, the sky takes on a deep, rich, sapphire blue. This isn’t just prettier than a flat black sky; it’s also technically better for your phone’s camera.
The « blue hour » provides a soft, ambient light that fills in shadows and creates a beautiful contrast with the warm, artificial lights of the city that are just beginning to switch on. Your phone’s sensor has more information to work with, resulting in less grain and more detail in the shadows. Instead of a scene with a few bright lights against an inky, information-less void, you get a dynamic image with texture, depth, and a stunning color palette. In the UK, this precious window typically happens in the 20-40 minutes immediately following sunset.
Planning your night out to start a little earlier and catching this window can elevate your photos from simple snaps to something far more atmospheric and professional. The key is knowing exactly when it will happen. While you can look up sunset times, several apps are designed to give photographers the precise timing for any location. Here are some of the best:
- PhotoPills (iOS & Android): The gold standard for many photographers, offering precise blue hour and golden hour times with augmented reality planning tools.
- The Photographer’s Ephemeris (iOS, Android & Web): Provides exact blue hour timing along with detailed sun and moon position data for meticulous planning.
- Sun Surveyor (iOS & Android): Features a 3D compass that visualizes the blue hour window and the sun’s path, helping you plan your shooting direction.
How does AI remove grain from low-light photos without blurring details?
You’ve taken the shot, but when you zoom in, you see it: a fizzy, sandy texture all over the image, especially in the dark areas. This is digital « noise » or grain, and it’s the result of your phone’s camera sensor being pushed to its limits in low light. For years, the only way to reduce this was with crude software that essentially blurred the noise away—taking all the sharp details with it and leaving faces looking like plastic dolls.
Today’s AI is much smarter. Modern computational photography algorithms, like those in Google Photos or the latest iPhones, don’t just blur things. They have been trained on millions of images to understand the difference between unwanted noise and desirable detail. When you apply an AI denoise function, it analyzes the image on a pixel level. It identifies noise by its random, inconsistent pattern (chrominance noise, the colorful speckles, and luminance noise, the grainy texture) and separates it from the image’s actual structures, like the texture of a jacket, a strand of hair, or the edge of a building.
The AI then intelligently smooths out only the parts it identifies as noise while actively preserving or even enhancing the edges and textures it identifies as detail. It’s a selective, sophisticated process that allows for clean, sharp images without that dreaded over-smoothed, waxy look. Most of this happens automatically in your phone’s Night Mode, but there are also powerful apps that give you more control. Many of these tools are free or already part of apps you own:
- Lightroom Mobile (iOS & Android): Features a powerful AI Denoise function with a simple slider to control the amount, working wonders on RAW files.
- Snapseed (iOS & Android – Free): A fantastic free tool from Google. Under the ‘Details’ tool, you’ll find ‘Structure’ and ‘Sharpening’, along with a dedicated noise reduction function.
- Google Photos (Built-in): Don’t underestimate the simple ‘Enhance’ button. It runs a powerful suite of AI tools, including de-noising and sharpening, with a single tap. Often, it will proactively suggest un-blurring or enhancing your noisy shots.
How to adjust ISO manually to reduce grain in indoor shots?
Why are my night photos so grainy? This is a question I hear all the time. The grain, or « noise, » comes from your phone cranking up a setting called ISO. Think of ISO as an artificial way to brighten a photo. A low ISO (like 100 or 200) produces a very clean, high-quality image but needs a lot of light. A high ISO (like 3200 or 6400) can make a photo brighter in a dark room, but it comes at a cost: it introduces that ugly digital grain and can wash out colors.
When you leave your phone on ‘Auto’, it will often panic in low light and ramp up the ISO to extreme levels to get a bright exposure, sacrificing image quality in the process. Taking back manual control of the ISO is one of the most powerful moves you can make. By opening your phone’s ‘Pro’ or ‘Manual’ mode, you can set the ISO yourself. The goal is to keep it as low as possible. As a general rule, professional smartphone photography guidelines recommend keeping your ISO between 100-400 for the cleanest results. To compensate for the darker image, you will need a longer shutter speed—which is why the stabilization techniques from earlier are so critical.
But every phone is different. An ISO of 1600 might look great on a brand-new flagship phone but terrible on a model from three years ago. The single most useful thing you can do is to find your own phone’s « breaking point »—the highest ISO you can use before the grain becomes unacceptable to you. This is a simple test you can do at home in ten minutes.
Checklist: Find Your Phone’s ISO Breaking Point
- Set the Scene: Find a dimly lit but consistently lit spot at home. Place an object with some texture or fine detail (a book cover, a plant) in the scene.
- Go Pro Mode: Open your camera’s ‘Pro’ or ‘Manual’ mode. Lock your shutter speed to something reasonable like 1/30s so it doesn’t change.
- Take the Shots: Take identical, stabilized shots of the same scene at different ISO values. Start at ISO 400, then shoot at 800, 1600, 3200, and your phone’s maximum.
- Analyze on a Big Screen: Transfer the images to a laptop or tablet. Zoom in to 100% and compare the level of grain, color splotches, and loss of detail in each shot.
- Identify Your Limit: Be honest with yourself. Find the highest ISO where you still find the image quality acceptable. This is your personal « maximum usable ISO » for future shoots.
Key takeaways
- Your phone isn’t the problem; understanding light and motion is the solution.
- Stabilization is king: use your environment and your body as a tripod to eliminate camera shake.
- Control your light: correct for color casts, diffuse your flash, and shoot during the « blue hour. »
- Embrace modern tech: use Burst Mode to capture action and trust AI tools to clean up noise and minor blur.
AI Imaging Algorithms: How to Fix Blurry Night Shots Without Professional Editing Skills?
So, you did your best to stay still, but some shots still came out slightly blurry. In the past, that photo was destined for the trash. Today, you have an incredibly powerful darkroom assistant built right into your phone: AI image reconstruction. Tools like Google Photos’ ‘Unblur’ or Samsung’s ‘Remaster’ aren’t simple sharpening filters; they are sophisticated algorithms that analyze the photo to understand *why* it’s blurry and then attempt to computationally reverse it.
It’s important to understand what AI can and cannot fix. According to an analysis of AI deblur technology, these tools excel at correcting images with slight camera shake or minor subject motion. The AI detects the direction and pattern of the blur and effectively re-aligns the pixels. However, the technology has clear limits. If a photo is completely out of focus (i.e., the lens was focused on the background instead of your friend), the detail was never captured, so the AI has no data to reconstruct. Similarly, extreme motion blur from a fast-moving car or a very long exposure is usually beyond saving.
The best candidates for these AI fixes are your typical handheld night shots that are *almost* perfect but suffer from a tiny bit of softness from hand movement. For a student in Manchester wanting to save a great memory of a night out, these built-in tools are revolutionary, requiring zero editing skill. You can often fix a slightly blurry photo with a single tap, directly in your phone’s gallery. Here’s how to use the most common tools:
- Google Photos – Unblur: Open the blurry photo, tap ‘Edit’, scroll across to the ‘Tools’ section, and select ‘Unblur’. Google’s AI will analyze the image and apply the optimal correction automatically.
- Samsung Gallery – Remaster: Open your photo in the Samsung Gallery app, tap the three-dot menu in the bottom right, and select ‘Remaster picture’. The AI does all the work, enhancing sharpness, removing noise, and optimizing the image.
- General ‘Enhance’ Tools: Most phone galleries (including Apple Photos) have a one-tap ‘Enhance’ or ‘Auto’ button (often a magic wand icon). This runs a suite of AI optimizations that almost always includes intelligent sharpening and de-blurring. Always try this first.
The journey from a blurry, orange photo to a sharp, vibrant memory is about making a series of smart choices, not about owning expensive gear. By learning to see the light, stabilize your device, control motion, and leverage the powerful AI in your pocket, you have all the tools you need. Now, the next step is to put it all into practice. Go out on your next night out, not just to have fun, but to experiment. Try these techniques, find your phone’s limits, and start capturing the night the way you actually see it.