The frustrating truth about blurry night photos is that it’s rarely your fault; you’re often fighting a powerful AI that’s trying to help, but doesn’t understand your goal.
- Your phone’s « Night Mode » isn’t a long exposure; it’s a rapid burst of photos that AI stacks together to freeze motion and erase noise.
- AI automatically identifies subjects like food or faces and changes settings, but this can lead to unnatural skin tones or an « oil painting effect » if it tries too hard.
Recommendation: Instead of learning complex camera settings, learn to recognize what the AI is trying to do so you can guide it for better results or know when to turn it off for creative shots.
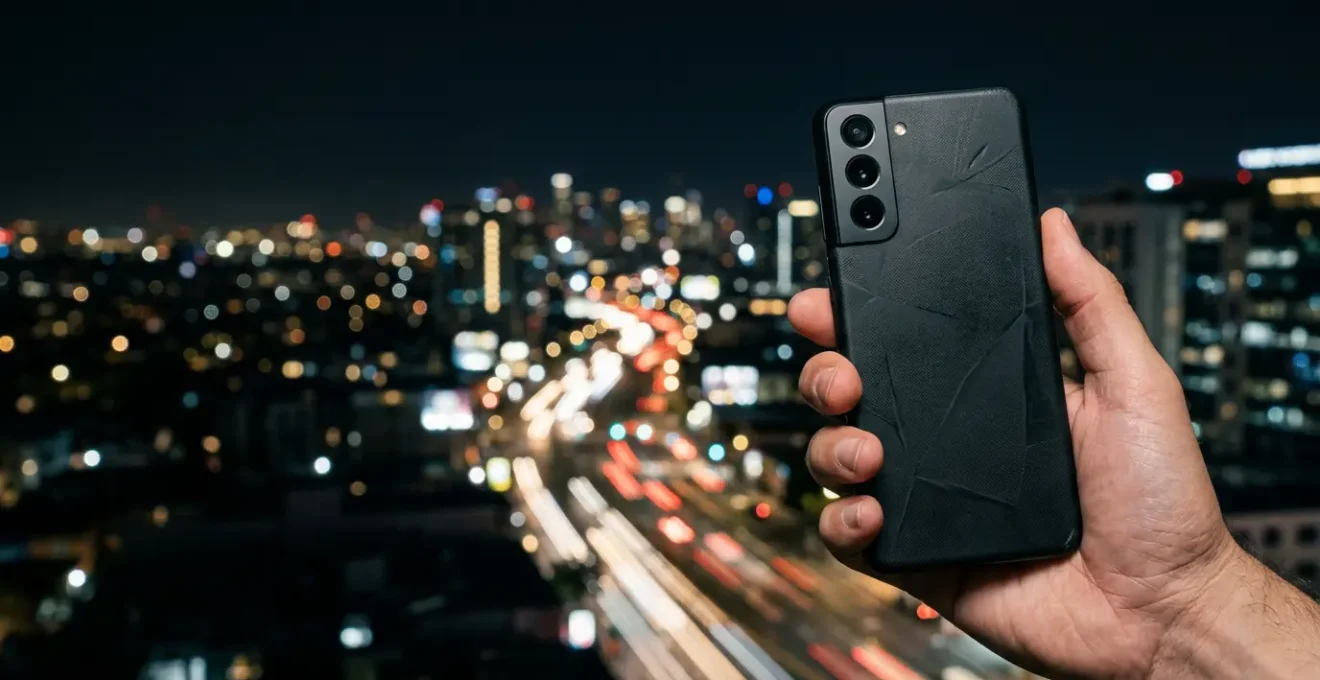
You see the perfect shot: the kids finally gathered around the birthday cake, their faces lit by candles in a dim room. You grab your phone, snap the picture, and… it’s a blurry, grainy mess. It’s a frustration every parent knows. You’ve probably heard the standard advice: « hold still, » « use a tripod, » or « learn to use Pro mode. » But what if the problem isn’t your shaky hands or lack of professional skill? What if the key is to understand the powerful supercomputer in your pocket?
As a software engineer working on imaging, I can tell you that your phone is not just a camera. It’s a computational photography device running millions of calculations for every photo you take. It has an opinion on what a « good » photo looks like. This article isn’t another list of tips you’ll forget. It’s an inside look at how your phone’s AI « thinks. » We’ll explore the computational pipeline that happens every time you press the shutter.
By understanding this hidden process—why it brightens shadows you wanted to keep dark, or why it sometimes makes faces look like plastic—you can stop fighting against the AI and start working with it. The secret to fixing blurry night shots isn’t becoming a photographer; it’s becoming a better partner to the intelligent software you already own. We will demystify the magic, from how it removes grain without destroying detail to why megapixels are less important than you think.
This guide will walk you through the core AI processes happening inside your camera. The following summary outlines the key concepts we’ll explore, helping you finally understand what your phone is doing and how to leverage it to capture the moments that matter.
Summary: AI Imaging Algorithms: A Guide to Fixing Blurry Shots Without Pro Skills
- Why does your camera change settings automatically when you point at food?
- How does AI remove grain from low-light photos without blurring details?
- Natural look or AI boost: which setting is best for skin tones?
- The « oil painting effect » error when AI tries too hard to sharpen images
- When to turn off AI enhancements for a more artistic silhouette shot?
- Why megapixels matter less than sensor size for cloudy day photography?
- The movement mistake that ruins 90% of low-light action shots
- Advanced Precision Optical Sensors: How to Capture Sharp Photos on Grey UK Days?
Why does your camera change settings automatically when you point at food?
Have you ever noticed your phone’s camera seems to make food look extra delicious, or that portraits have a softer background? This isn’t your imagination; it’s the first step in the AI computational pipeline: semantic segmentation, more commonly known as scene recognition. The moment you frame your shot, the AI analyzes the image in real-time, trying to understand *what* you are pointing at. Is it a landscape, a person, a pet, or a plate of pasta?
Based on this identification, the AI automatically applies a preset recipe of adjustments. For food, it might boost saturation and warmth to make the colors pop. For a portrait, it will prioritize accurate skin tones and might simulate a shallow depth of field. This process is incredibly sophisticated. The AI doesn’t just see a « face »; it recognizes eyes, hair, and skin, and can apply different micro-adjustments to each. This instant analysis and adjustment is what allows you to get a decent-looking shot without ever touching the settings.
This technology is remarkably accurate. In fact, research from the Mobile AI 2021 Challenge demonstrates that modern algorithms can identify the correct scene type with over 98% top-3 accuracy. So, when your phone automatically switches modes, it’s because its AI is highly confident it knows what you’re trying to capture and is applying what it’s been taught is the « best » setting for that subject.
How does AI remove grain from low-light photos without blurring details?
One of the biggest challenges in low-light photography is « noise »—that ugly, grainy texture that appears in dark areas. For years, the trade-off was simple: reducing noise also meant blurring fine details, resulting in a soft, smeary image. This is where modern AI models, particularly diffusion models, have revolutionized photography. They are trained to understand the difference between random digital noise and meaningful texture.
Think of it this way: the AI has studied millions of pairs of images—one perfectly clean, the other artificially noisy. Through this process, it learns what a strand of hair looks like versus random speckles, or the texture of a sweater versus a blotchy shadow. When you take a low-light photo, the AI analyzes the image and essentially asks, « Does this pixel pattern look like a real-world texture I’ve seen before, or does it look like the random noise I was trained to identify? »

As the image shows, this allows the AI to perform a « selective » cleanup. It can aggressively smooth out the random noise in flat areas like a wall or a dark sky while carefully preserving the intricate details in a woven fabric, a person’s hair, or the bark of a tree. A 2025 study on low-light denoising highlighted that advanced models can even distinguish between different types of noise (like color noise vs. luminance noise) and account for patterns specific to the camera’s sensor, leading to state-of-the-art detail preservation. This is how your phone delivers a clean shot without turning it into a blurry mess.
Natural look or AI boost: which setting is best for skin tones?
The way smartphone cameras render skin tones is one of the most contentious topics in computational photography. Should the AI aim for a perfectly accurate, clinical representation, or an idealized, « beautified » version? Most phones today lean towards the latter, applying subtle (and sometimes not-so-subtle) adjustments like skin smoothing, eye brightening, and even face slimming by default. This is a massive driver for the industry; the computational photography market is projected to reach $48.38 billion by 2032, largely fueled by the demand for better portrait and social media-ready features.
However, this « AI boost » can be problematic. The AI’s idea of « better » is based on the data it was trained on. If that data is not sufficiently diverse, the results can be biased, leading to inaccurate or unflattering rendering of different skin tones. This is a significant ethical and technical challenge that manufacturers are actively working to solve.
As the AI Authority Research Team points out in their analysis on AI in imaging:
Biased training data can result in biased AI-powered features. Smartphone camera manufacturers must use diverse datasets for training to avoid biases in scene detection, object recognition, and other AI functionalities.
– AI Authority Research Team, Smartphones are Using AI to Drive Imaging and Photo Experiences
So, which is best? For a parent capturing a quick, happy moment, the default AI boost is often « good enough » and saves time. It smooths out imperfections and produces a pleasing, bright image. However, if you notice skin tones looking unnatural or « plastic, » look for a « Natural » or « Faithful » setting in your camera app. This tells the AI to dial back the aggressive processing, giving you a more realistic, albeit less « perfect, » starting point.
The « oil painting effect » error when AI tries too hard to sharpen images
While AI denoising is powerful, it can sometimes be too aggressive. When the AI is faced with a very dark and noisy image, its two main directives—reduce noise and sharpen details—can come into conflict. In its attempt to « find » detail where there is very little, the AI can over-sharpen the noise it failed to remove, creating swirly, unnatural patterns. This is what photographers call the « oil painting effect, » where fine textures like grass, hair, or fabric lose their definition and look like they’ve been painted with thick brushstrokes.
This artifact is a classic sign of the AI’s algorithm making a mistake. It has misidentified noise as low-frequency detail and tried to « enhance » it. For a parent taking photos at an indoor party, this often happens to the background or to people’s clothing in dimly lit areas. The faces might look okay, but everything else has that strange, painterly texture. This happens because the AI didn’t have enough good data (light) to work with in the first place.
The solution isn’t to buy a new phone, but to give the AI better-quality information to start with. When you notice this effect consistently, it’s a signal to take a bit more manual control to bypass the most aggressive parts of the automated computational pipeline.
Action Plan: How to combat the « oil painting » effect
- Shoot in RAW format: This file type captures all sensor data without AI compression, giving you (or a simpler editing app) the power to adjust details without the phone’s baked-in opinion.
- Use Pro Mode controls: Switch to your phone’s « Pro » or « Manual » mode to manually lower the ISO (the setting that controls sensitivity and noise). A lower ISO means a cleaner, less noisy starting image for the AI.
- Adjust texture before sharpening: In an app like Lightroom Mobile or Snapseed, work with the RAW file. Apply noise reduction and texture adjustments first, then add sharpening sparingly at the very end.
- Find better light, not flash: Instead of the harsh on-camera flash, move your subject closer to an ambient light source like a lamp or a window. This gives the AI more « food » to work with, reducing its need to guess.
When to turn off AI enhancements for a more artistic silhouette shot?
So far, we’ve discussed how AI helps create a « technically perfect » photo: bright, sharp, and full of detail. But what if your artistic intent is the exact opposite? What if you want to capture a dramatic silhouette of your child against a beautiful sunset? This is a classic scenario where the user’s goal is in direct conflict with the AI’s programming. The AI sees a dark foreground and a bright background and immediately identifies it as a « problem » to be solved.
Its primary directive in this situation is to balance the exposure. It will try to brighten the shadows to reveal the detail in the subject, effectively ruining your silhouette. As an analysis of smartphone Night Modes shows, the entire purpose of the feature is to bring out detail from darkness. To achieve an artistic silhouette, you need to tell the AI to stand down. This is a moment of intentionality, where you override the technology to achieve a creative vision.

Fortunately, this is easy to do. First, make sure you tap on the bright background (the sky) to set your focus and exposure point. This tells the camera that the sky is the most important part of the scene. Then, most camera apps will show a small sun or lightbulb icon with a slider. Swipe down on this slider. This is called exposure compensation, and you are manually telling the camera to make the entire scene darker. By setting it to -1 or -2, you’ll force your subject into a deep, clean silhouette that the AI won’t try to « correct. »
Why megapixels matter less than sensor size for cloudy day photography?
For years, marketing has trained us to believe that more megapixels equal a better camera. While megapixels (MP) matter for printing large photos, they are a poor indicator of image quality, especially in low-light situations like a cloudy day or an indoor party. The far more important factor is the physical size of the camera’s sensor.
A great analogy is to think of the sensor as a bucket and light as rainwater. A larger sensor is a bigger bucket. In the same amount of time, it can collect more light than a smaller bucket. This extra light translates directly into a better photo with richer colors, more detail in the shadows and highlights (dynamic range), and less digital noise. This is why a professional camera with a large sensor and « only » 12MP will produce a vastly superior image to a smartphone with a tiny sensor boasting 200MP.
A larger sensor is like a bigger bucket collecting rainwater. It can capture more light, resulting in richer details, better dynamic range, and improved low-light performance.
– ALAgrApHY, The Megapixel Myth: Understanding Smartphone Camera Quality and Sensor Size
When manufacturers cram a huge number of megapixels onto a tiny smartphone sensor, the individual pixels become incredibly small. These tiny « buckets » can’t collect much light, so they are more prone to noise, especially on a grey, overcast day when light is scarce. While AI can help clean this up, it’s always better to start with a stronger signal (more light). Indeed, research demonstrates that a 12MP large sensor consistently outperforms a 48MP smartphone sensor in low-light tests. So when you’re shopping for a new phone, look for mentions of sensor size (e.g., 1-inch type, or 1/1.3″) rather than just chasing the highest megapixel count.
The movement mistake that ruins 90% of low-light action shots
Here’s the most common source of frustration for parents: your photo is blurry, and you assume it’s because your hand moved. But often, the problem is different. You need to distinguish between two types of blur: camera shake (your hand moving) and motion blur (your subject moving). Modern AI is exceptionally good at correcting the first, but struggles with the second.
When you use « Night Mode, » your phone isn’t taking one single long exposure like a traditional camera. Instead, it engages in multi-frame synthesis. It captures a rapid burst of many shorter-exposure photos over 2-3 seconds. The short exposures « freeze » the motion of your subject (like a child running). Then, the AI gets to work. It analyzes all the frames, aligns them to cancel out the slight camera shake from your hand, and then merges them. This process averages out the noise while preserving the detail from the sharpest parts of each frame. It’s how you can get a sharp photo of a static object in near darkness.
The problem arises when your subject is moving quickly during that 2-3 second capture window. The AI can align the static background perfectly, but it can’t magically make a moving child sharp across all frames. The result is often a sharp background with a ghostly, blurry subject. To fix this, you need to help the AI. Use your camera’s burst mode. Hold the shutter button down for a second or two. This captures a quick series of full-quality images. In your photo gallery, you can then select the burst and let the AI itself suggest the sharpest frame, where your child was momentarily stillest.
Key Takeaways
- Your phone’s camera AI is a partner; understanding its goals (balancing exposure, reducing noise) is key to getting the shots you want.
- The « oil painting effect » and unnatural skin tones are signs of the AI over-processing. Feeding it better light or using RAW format gives it less room for error.
- For artistic shots like silhouettes, you must intentionally override the AI’s goal of a « perfectly lit » photo by using exposure compensation.
Advanced Precision Optical Sensors: How to Capture Sharp Photos on Grey UK Days?
On a dreary, overcast day, the amount of available light is significantly reduced, making your camera’s job much harder. This is where the hardware foundation, specifically the optical sensors and stabilization systems, becomes critical. Two acronyms you’ll often see are OIS and EIS, and they represent two different philosophies for combating camera shake—the primary cause of blurry photos in low light.
OIS (Optical Image Stabilization) is a physical, hardware-based solution. A tiny motor with gyroscopes detects your hand’s micro-movements and physically shifts the lens or the sensor in the opposite direction to cancel them out. Because it allows the shutter to stay open slightly longer to gather more light without introducing blur, it is exceptionally effective for still photography in dim conditions.
EIS (Electronic Image Stabilization) is a software-based solution, a core part of the computational pipeline. It works by slightly cropping the image from the sensor and then using the buffer area to digitally shift the frame around to counteract movement. While it can be very effective, especially for video, it always involves a slight loss of image quality or resolution due to the crop.
As the market for AI-driven cameras grows, with the global AI camera market projected to reach $47.02 billion by 2030, manufacturers are increasingly combining both systems. OIS provides the stable hardware foundation, and EIS refines it in software. The following table, based on an analysis of camera technologies, breaks down the key differences:
| Feature | OIS (Optical Image Stabilization) | EIS (Electronic Image Stabilization) |
|---|---|---|
| Mechanism | Physical motor moving lens/sensor | AI cropping and realigning image frame |
| Power Consumption | Higher (mechanical components) | Lower (software-based) |
| Image Quality Impact | No resolution loss | Slight crop/resolution reduction |
| Low-Light Performance | Excellent (allows slower shutter) | Good (software noise reduction) |
| Video Stabilization | Very effective for hand-shake | Excellent for walking/movement |
| Best Use Case | Night photography, low-light stills | Video recording, dynamic scenes |
| Modern Implementation | Combined with EIS for optimal results | Combined with OIS for optimal results |
By understanding this internal « thinking » process, you can finally start getting the photos you want. Instead of fighting your phone, you can guide it, giving it the best possible information to work with and knowing when to take the reins for a more creative shot. Start experimenting with these concepts, and you’ll see your low-light photography improve dramatically, no professional skills required.